In Investigating Functions with a Ferris Wheel: Part 1 I shared two Web Interactives.
Here are some tips to for using the Ferris Wheel Distance-Height Interactive with students.
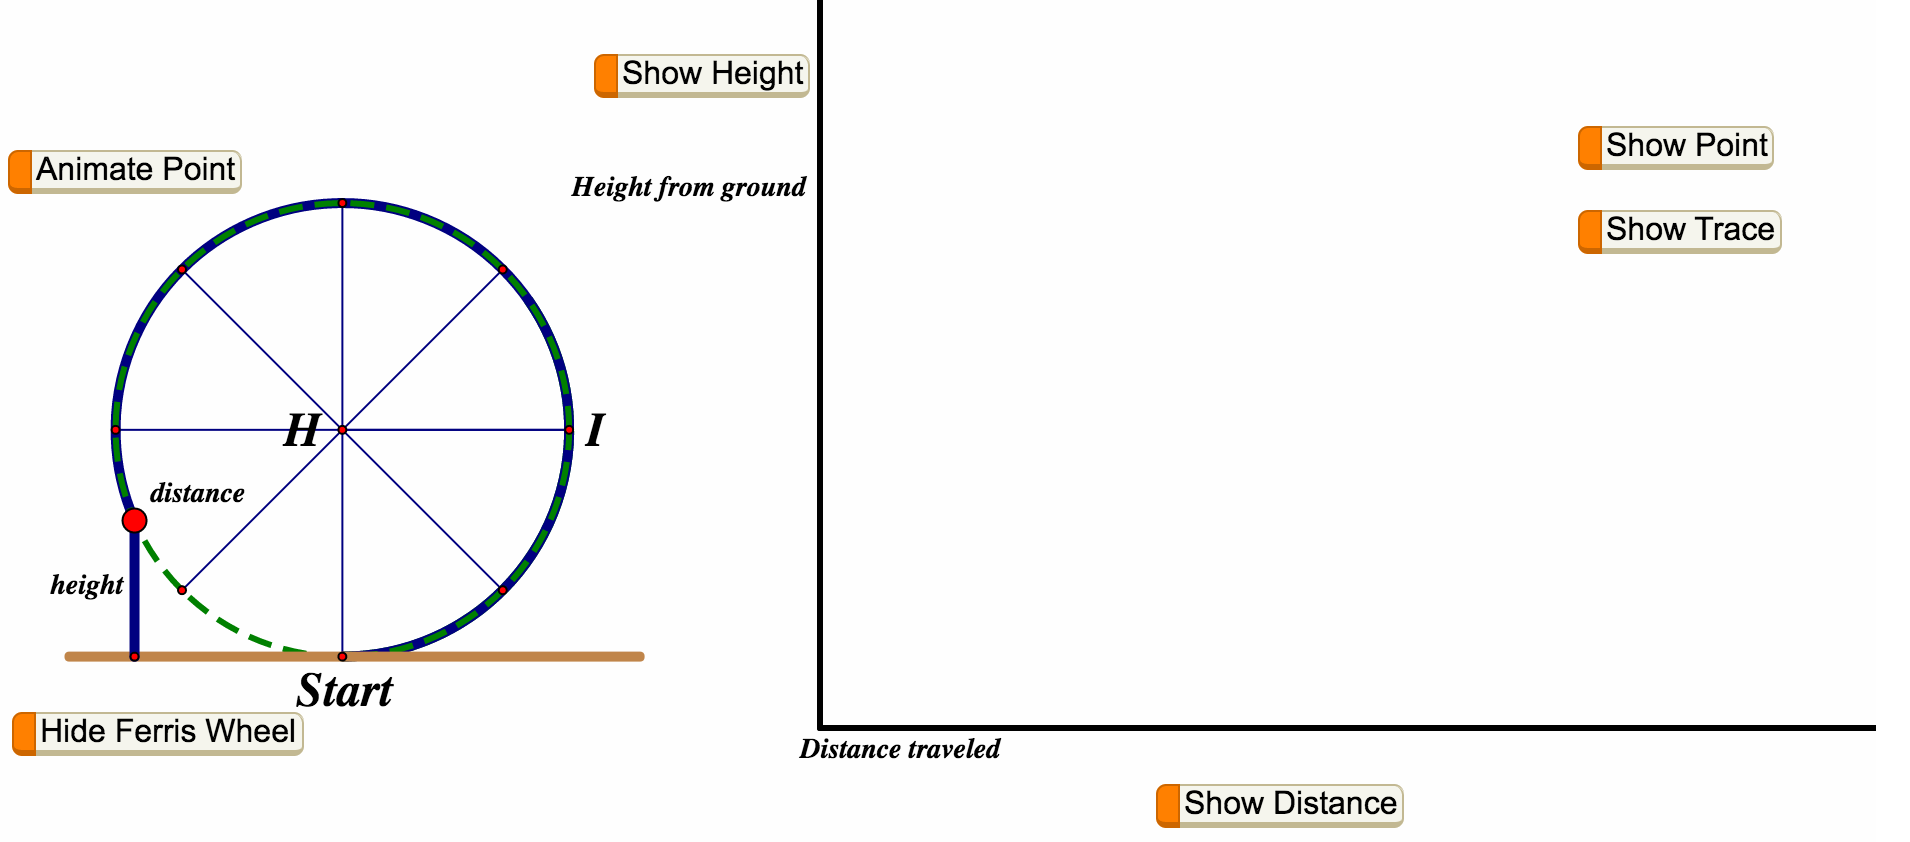
Explore changing distance and height: Ferris wheel animation
- Click Hide Height, Hide Distance, Hide Point, and Hide Trace.
- Press Animate Point.
- Questions for students: For a car beginning at start and moving once around the wheel, (1) How is its distance from start changing? (2) How is its height from the ground changing?
- Teaching Tip: Have students use their fingers to trace along the Ferris wheel to show the distance and height. [Students might think the literal words ‘distance’ and ‘height’ are changing. Focus their attention on lengths.]
Explore changing distance: Animation & Dynamic Segments
- Drag the active point (Ferris wheel car) nearer to Start. Click Show Distance.
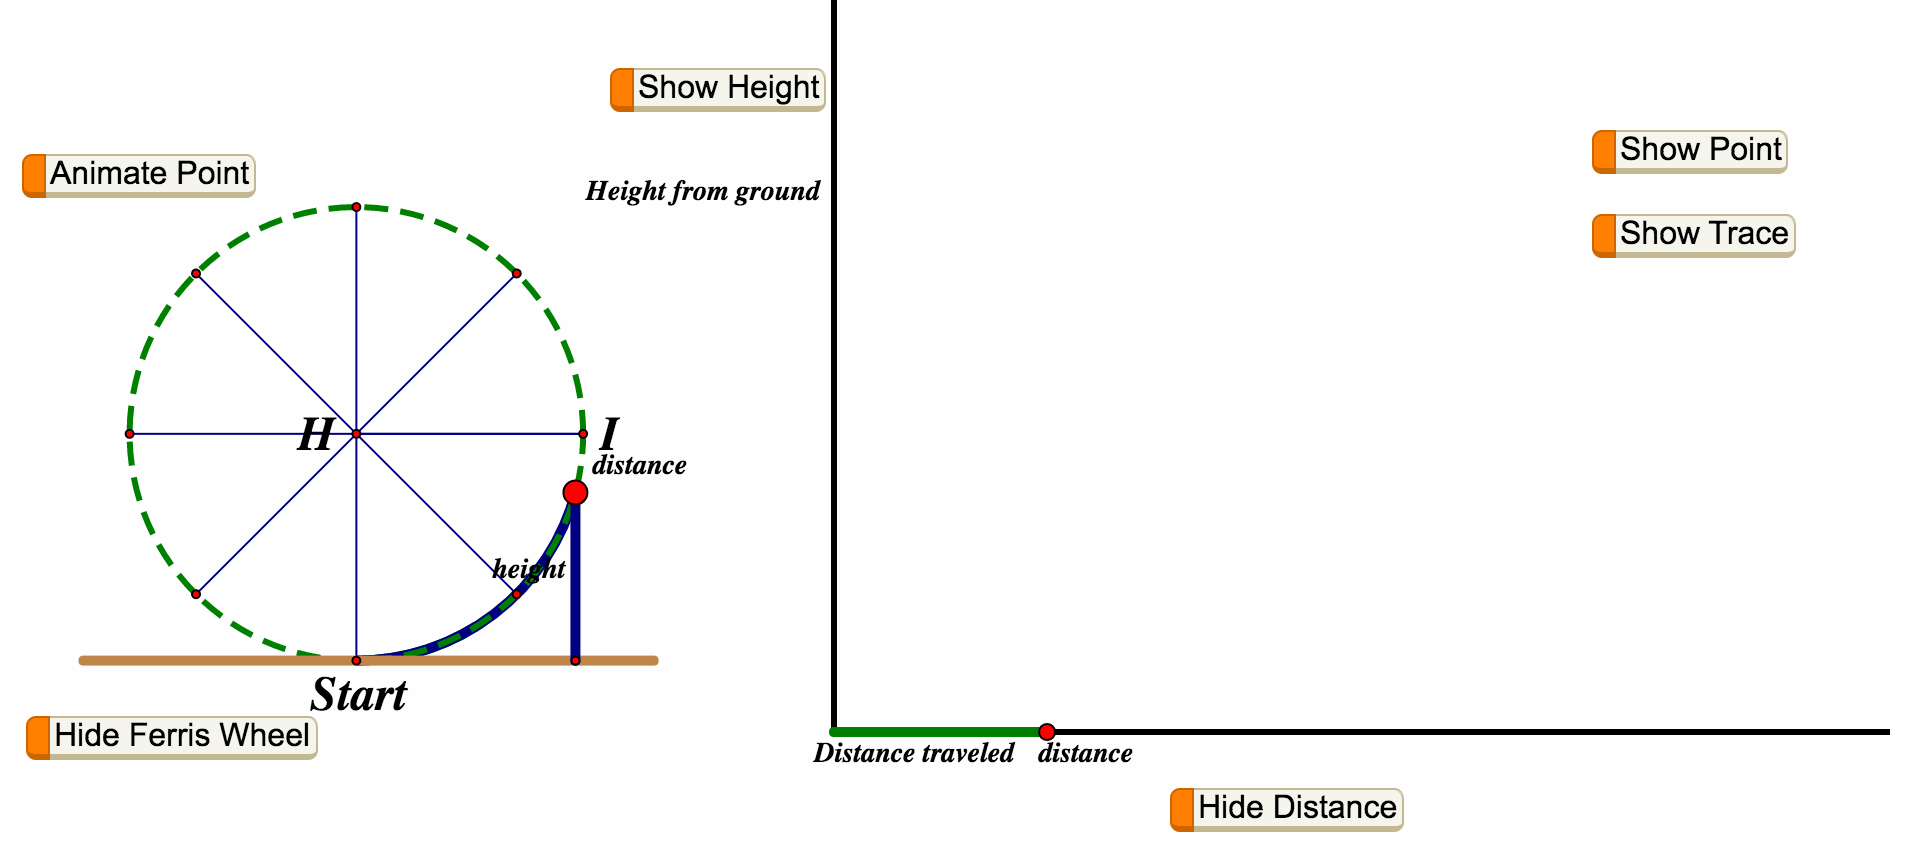
- Before pressing Animate Point, ask students to predict how the dynamic distance segment would change as the car moves once around the wheel.
- Once students make predictions, press Animate Point. The Ferris wheel animation and dynamic distance segment will move together.
- Teaching Tips:
- Have students use their fingers to show how the dynamic distance segment will change.
- Students might be surprised that the dynamic segment stays on the horizontal axis, because they may not have seen many graphs with points only on an axis.
- Students might think that the dynamic segment for distance has to be the same length as the actual distance around the wheel. Allow students to investigate why this does not need to be the case.
Explore changing height: Animation & Dynamic Segments
- Drag the active point (Ferris wheel car) nearer to Start. Click Show Height. Click Hide Distance.
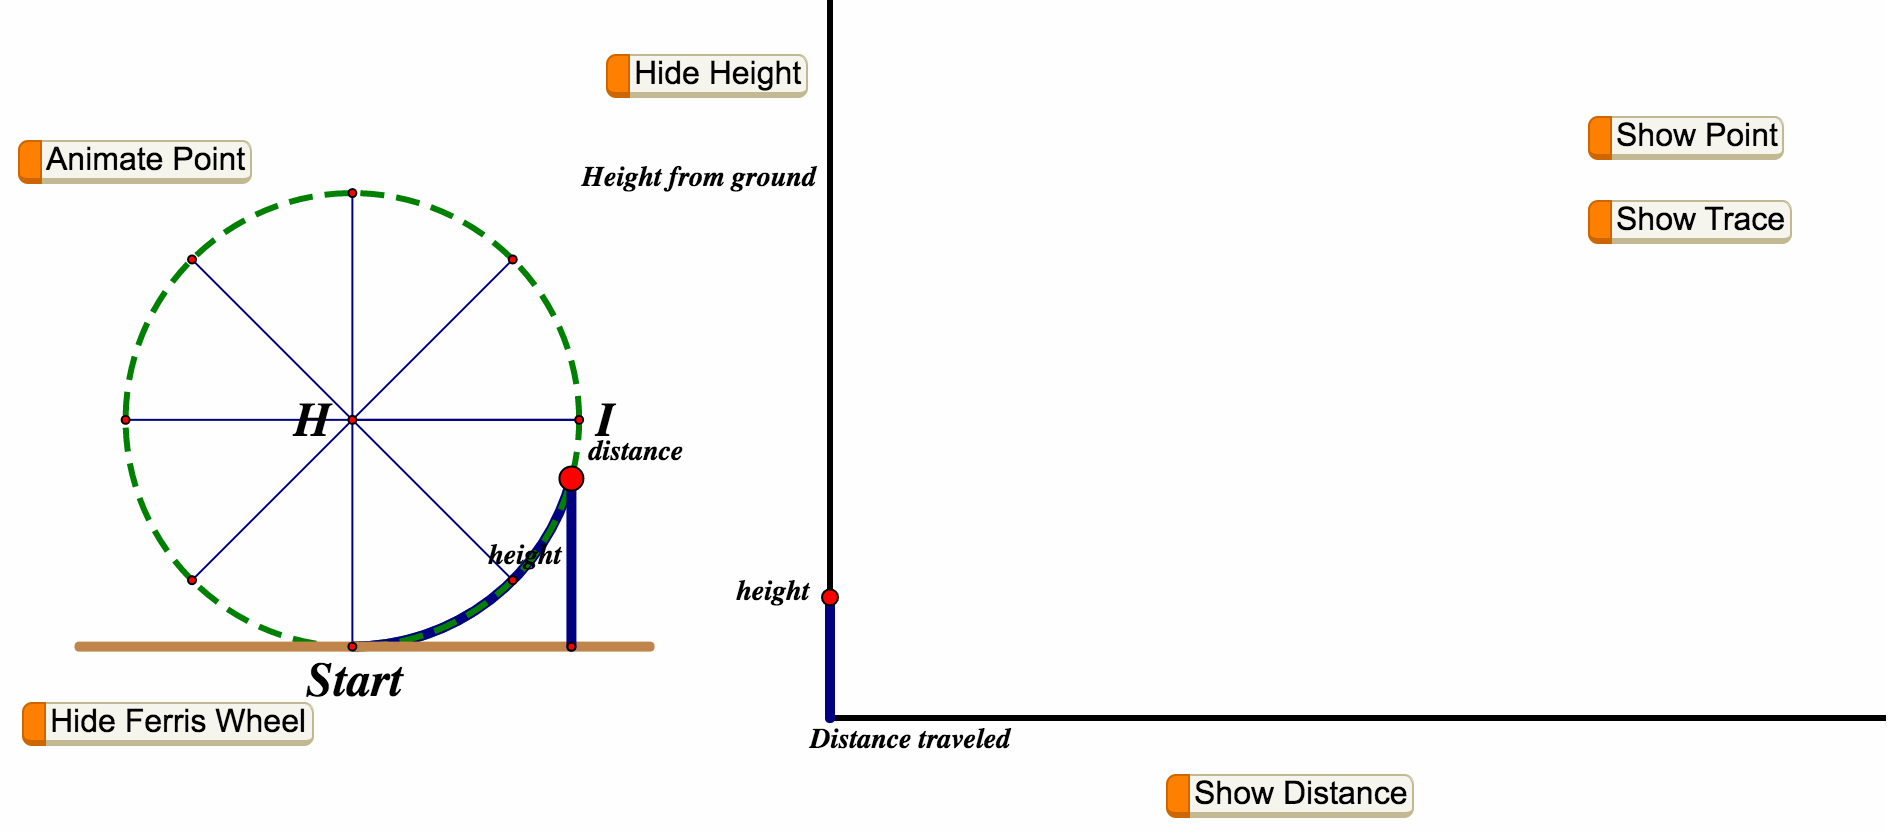
- Before pressing Animate Point, ask students to predict how the dynamic height segment would change as the car moves once around the wheel.
- Once students make predictions, press Animate Point. The Ferris wheel animation and dynamic height segment will move together.
- Teaching Tips: See the Teaching Tips for distance. Apply those Teaching Tips for height.
Explore changing distance and height: Animation & Dynamic Segments
- Drag the active point (Ferris wheel car) nearer to Start. Click Show Height. Click Show Distance.
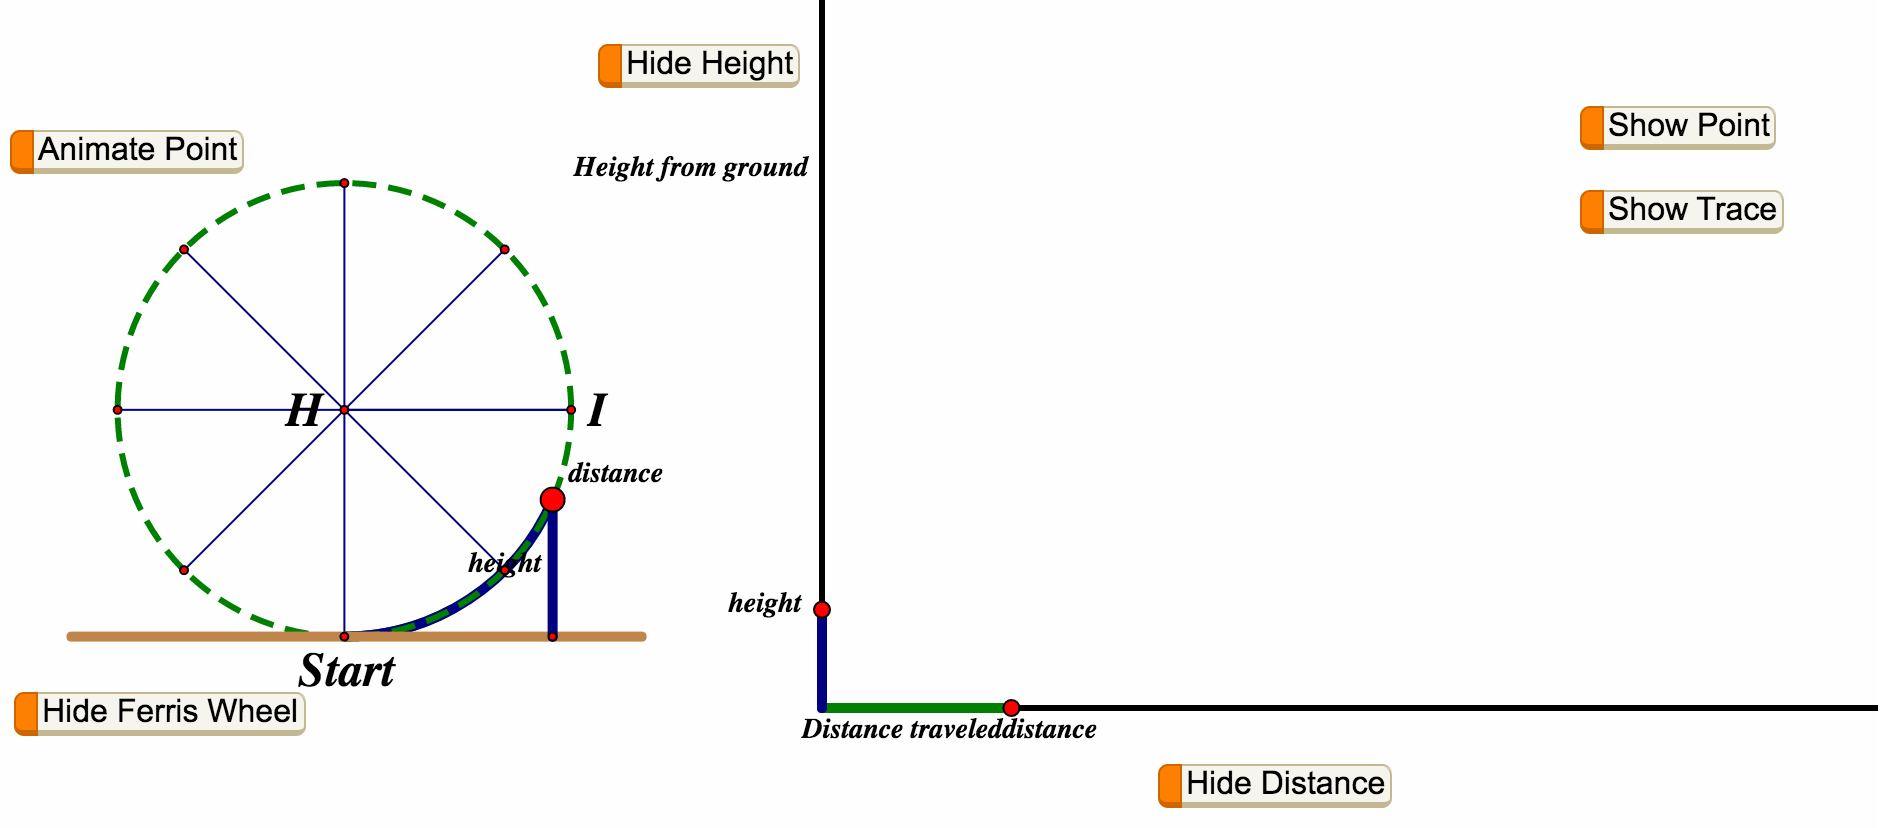
- Before pressing Animate Point, ask students to predict how the dynamic height and distance segments would change together as the car moves once around the wheel.
- Once students make predictions, press Animate Point. The Ferris wheel animation and dynamic height and distance segments will move together.
- Teaching Tips:
- Ask students if changing the speed of the Ferris wheel would affect the dynamic height and distance segments. [The motion would occur faster or slower, but the dynamic height and distance segments would still change in the same way.]
- Ask students to compare and contrast the ways in which the dynamic height and distance segments change. [The height segment changes direction. As the car is moving around the Ferris wheel, the dynamic height segment increases and decreases faster or slower depending on where the car is on the wheel; the distance segment only increases, and it increases at a constant rate.]
Want more?
In upcoming blog posts, I’ll be sharing more ideas for using these Web Sketchpad activities.
What do you think?
How have you used these Web Sketchpad activities with your students? Let me know in the comments, or let me know on Twitter @HthrLynnJ.
Pingback:Investigating Functions with a Ferris Wheel. Part 3: Exploring Distance and Width | Investigating Students' Math Reasoning